RMarkdown Tools: Interactive Presentations, Apps, Websites
Cory Merow
9/19/2017
This tutorial is a quick start guide extending the basic R Markdown skills from __ to getting started with interactive presentations, apps that can be hosted online or run locally, and R-based websites. The RStudio team has excellent complete tutorials on each of these (); this tutorial is meant to show how easy it is to get started with some key features.
1 Interactive presentations (with ioSlides)
1.1 Motivation
Interactive Slides …
- allow you or students to tinker with inputs and see the results on the fly
- are completely reproducible and sharable
- update presentation automatically if code changes
- maintain simplicity in presentations
1.2 Getting Started
To create an ioslides presentation from R Markdown you specify the ioslides_presentation output format in the front-matter of your document. Open a new file with File -> New File -> RMarkdown -> Presentation -> HTML(ioslides) and paste in the following chunks:
---
title: "Demo with ioslides"
author: Cory Merow
date: Sept, 20, 2017
output: ioslides_presentation
runtime: shiny
---

## Example Heading

  Headings are specified by #, ##, or ----

## Text formatting

**bold**

`code`

equations: $H=-\sum_{i=1}^S p_i \log_b  p_i$

## Lists

* list element 1
    + subelement (this line needs to start with a tab, not a space)
* list element 2
    + subelement
1.3 Interactive web elements
Elements like these can be places directly in your presentation.
## Loading required package: permute## Loading required package: lattice## This is vegan 2.5-5These are commented out because they won’t render on the site; download the example below to see them in action.
Download the extended version of this demo to see interactive components here.
More on basic markdown authoring
Comprehensive ioslides tutorial
1.4 Display Modes
The following single character keyboard shortcuts enable alternate display modes:
- ‘f’ enable fullscreen mode
- ‘w’ toggle widescreen mode
- ‘o’ enable overview mode
- ‘h’ enable code highlight mode
- ‘p’ show presenter notes
2 Applications (with Shiny)
Ok, so this isn’t R markdown, but its another way to use interactive widgets shown above that is related. If you find the interactive components useful, it only a small jump to full app development with shiny
2.1 Motivation
- Dynamically interacting with research helps others understand your work
- Allows point-and-click that’s actually reproducible with code
2.3 A fancy example: Wallace
# install.packages('wallace')  # only if you haven't already
library(wallace)
run_wallace()
In case you’re curious, here’s the source code for wallace
3 Websites (like this)
All the content for this website was generated from R Markdown documents. You can download of fork the repo here to make your own.
We encourage others to use and modify our content on their own websites. It’d be nice if you mentioned us (Adam Wilson and Cory Merow).
3.1 Demo
- Download a website template based on this site here
Unzip the directory and open a new RStudio project, setting this as the directory
Under the build tab, you should see ‘build website’. Click it and you have a website.

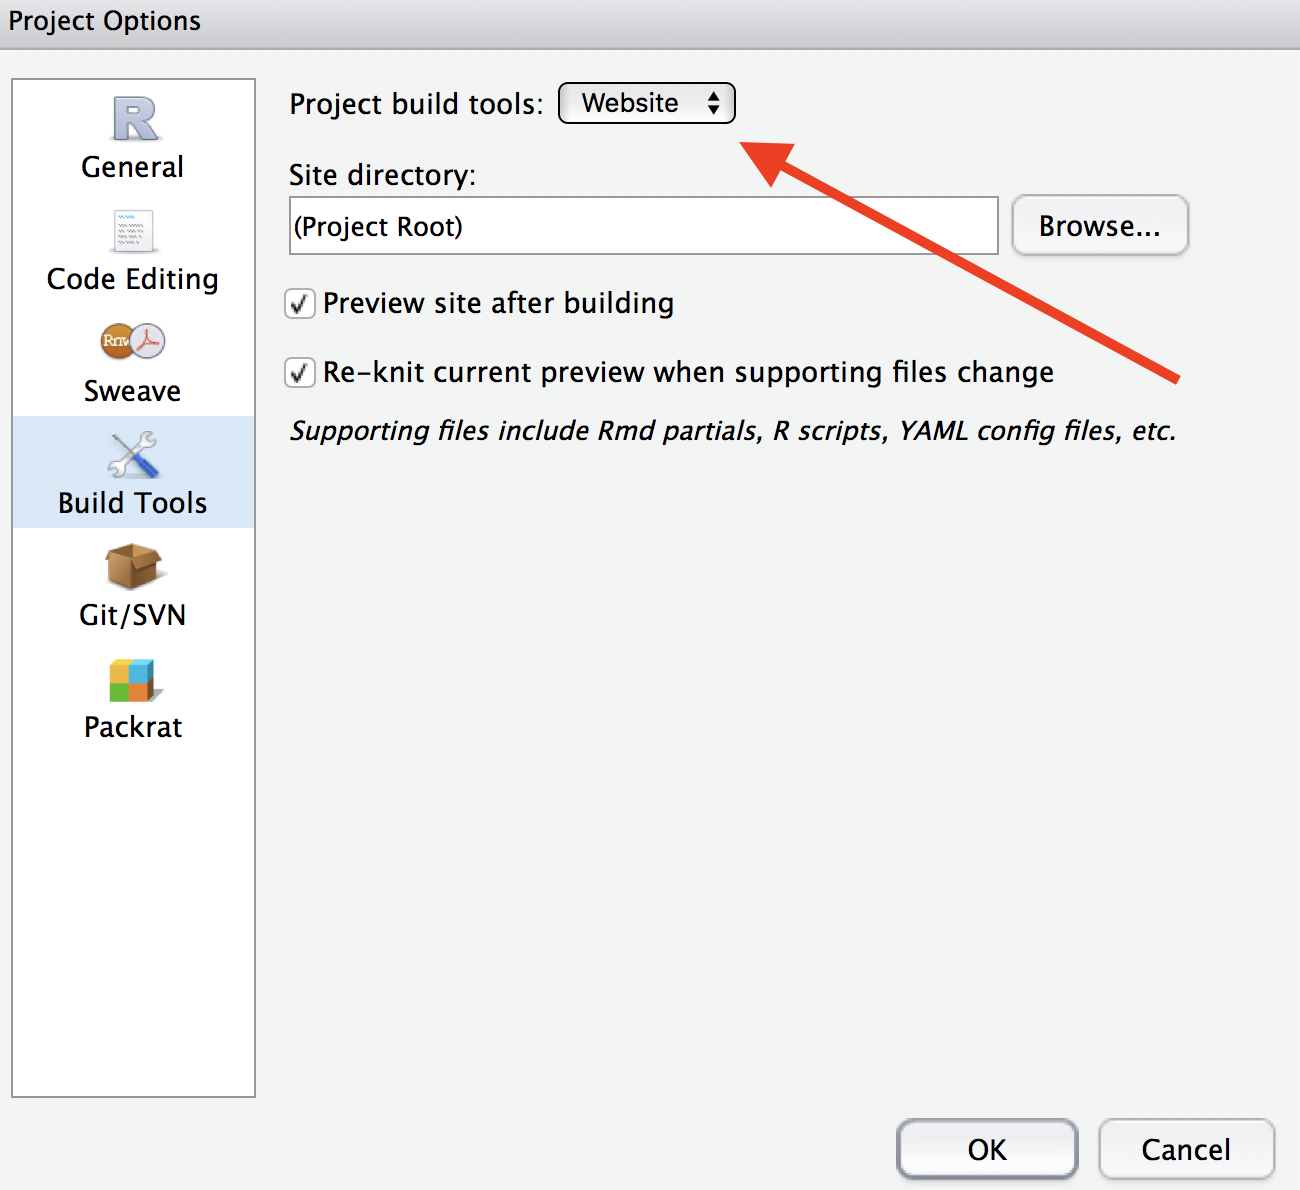
If you don’t see this button, set the project build tools to website (click project name on the top right, then project options)
3.2 Tips
There a few tricks to get this up and running once you’ve created an RStudio project and added the cloned version our repo:
All the .Rmd files for the website need to be in the same directory (that’s why the github repo looks a little messy).
You simply write the Rmd, click Run Document (analogous to knit), and the other files are built automatically
There are a couple of website-specific files to edit:
- _site.html: sitewide formatting options
- _navbar.html: set up the tabs along the tops of pages
- index.Rmd: set up the welcome page